
I find it quite tiring whenever I have to sift through lengthy Swagger documentation and then try to decipher the intricacies of each API endpoint. I had to devise a way to solve this problem so I wouldn’t have to deal with this tiring task.
In this blog post, I will show you a step-by-step guide on how to convert your Swagger documentation into a practical Postman collection seamlessly. With my straightforward instructions, you’ll be able to streamline your API development process and save time in the long run.
Whether you’re a seasoned developer or just starting, this guide is perfect for anyone looking to improve their API documentation and collection management skills. So, let’s dive in and explore the world of Postman and Swagger!"
What is Postman?
Postman is a software tool designed for testing and debugging HTTP APIs. It provides a user-friendly interface for sending HTTP requests and retrieving responses from APIs, allowing developers to test and validate their API endpoints easily. With Postman, developers can send requests, view responses, and inspect headers, query parameters, and body content. Additionally, Postman offers features such as automated request chains, environment variables, and collaboration tools, making it a powerful and versatile API development and testing tool.
What is Swagger?
Swagger is an open-source framework that provides a set of guidelines, specifications, and tools for creating and documenting RESTful APIs. It enables developers to create interactive and machine-readable API documentation, which typically includes details such as supported operations, parameters, outputs, authorization requirements, available endpoints, and licensing information. Swagger can automatically generate this documentation by analyzing the source code and retrieving documentation files from the API’s annotations.
Swagger supports both top-down and bottom-up API development approaches. In the top-down, or design-first, method, developers can use Swagger to design an API before writing any code. In the bottom-up, or code-first, method, Swagger takes the existing code for an API and generates the documentation automatically.
Step 1: Copy the Swagger Documentation URL
To initiate the conversion process, navigate to the Swagger Documentation page and find the /swagger/microstar-1.0.yml located at the top left corner of the page. This particular link may differ depending on the framework and library you are using. The framework I’m using here is Micronaut, a web framework similar to
Spring Boot
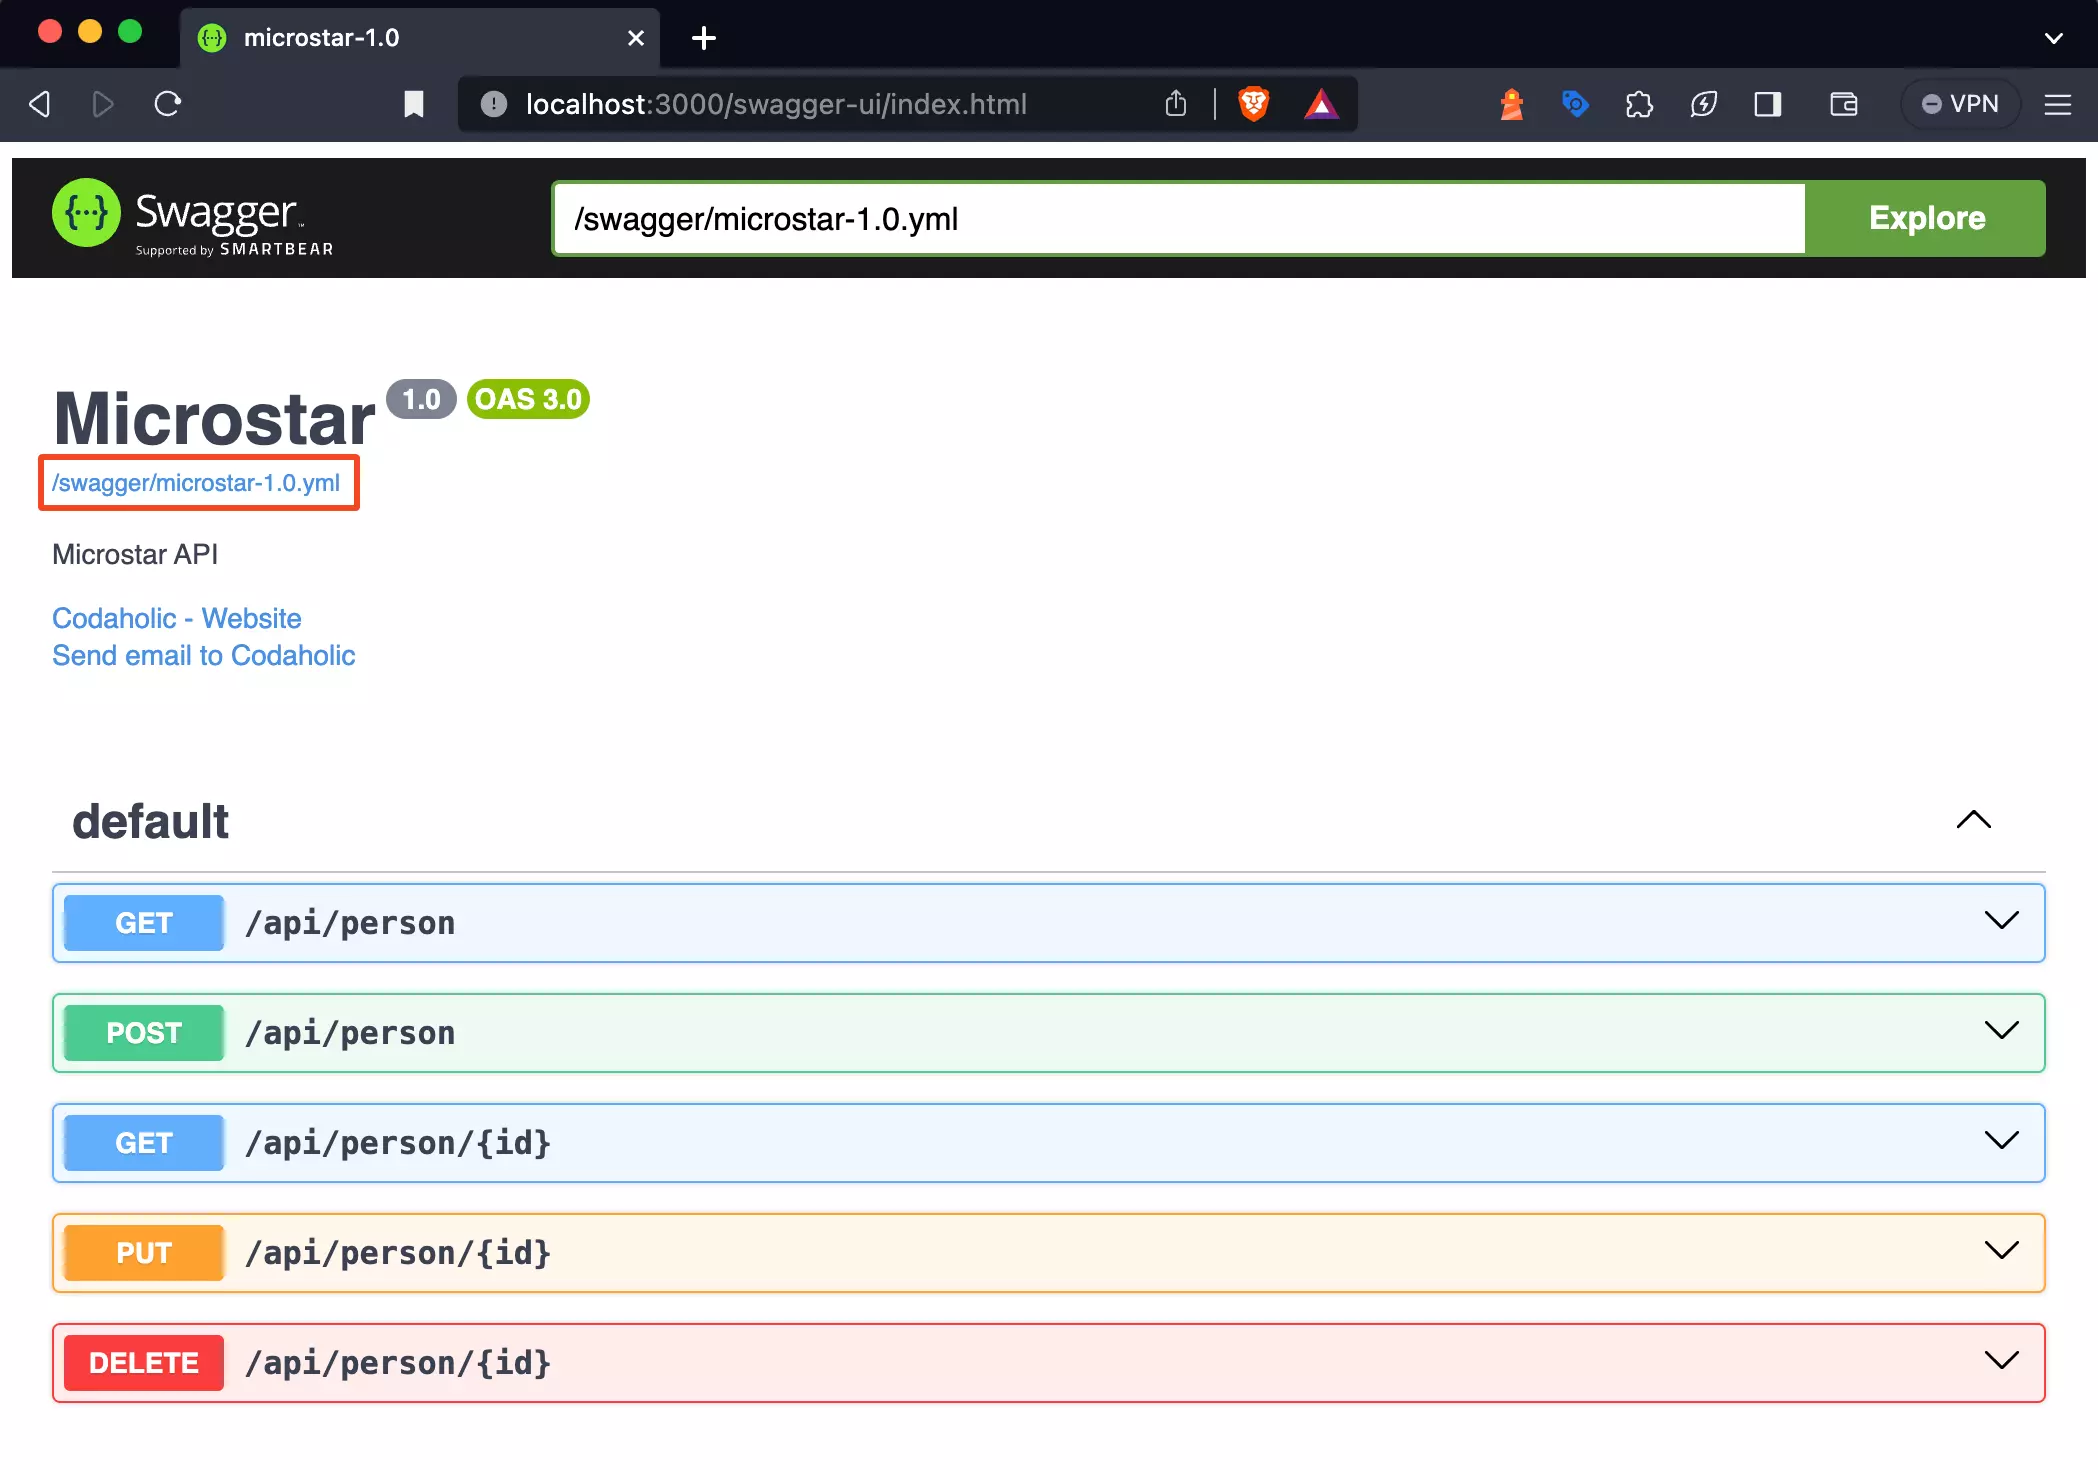
Once you click the link, the page will display the Swagger documentation in JSON format. Don’t worry if the appearance doesn’t match what you’re expecting; you just may be using a JSON viewer extension on your browser to view the documentation. You’re good to go as long as you can see the JSON format.
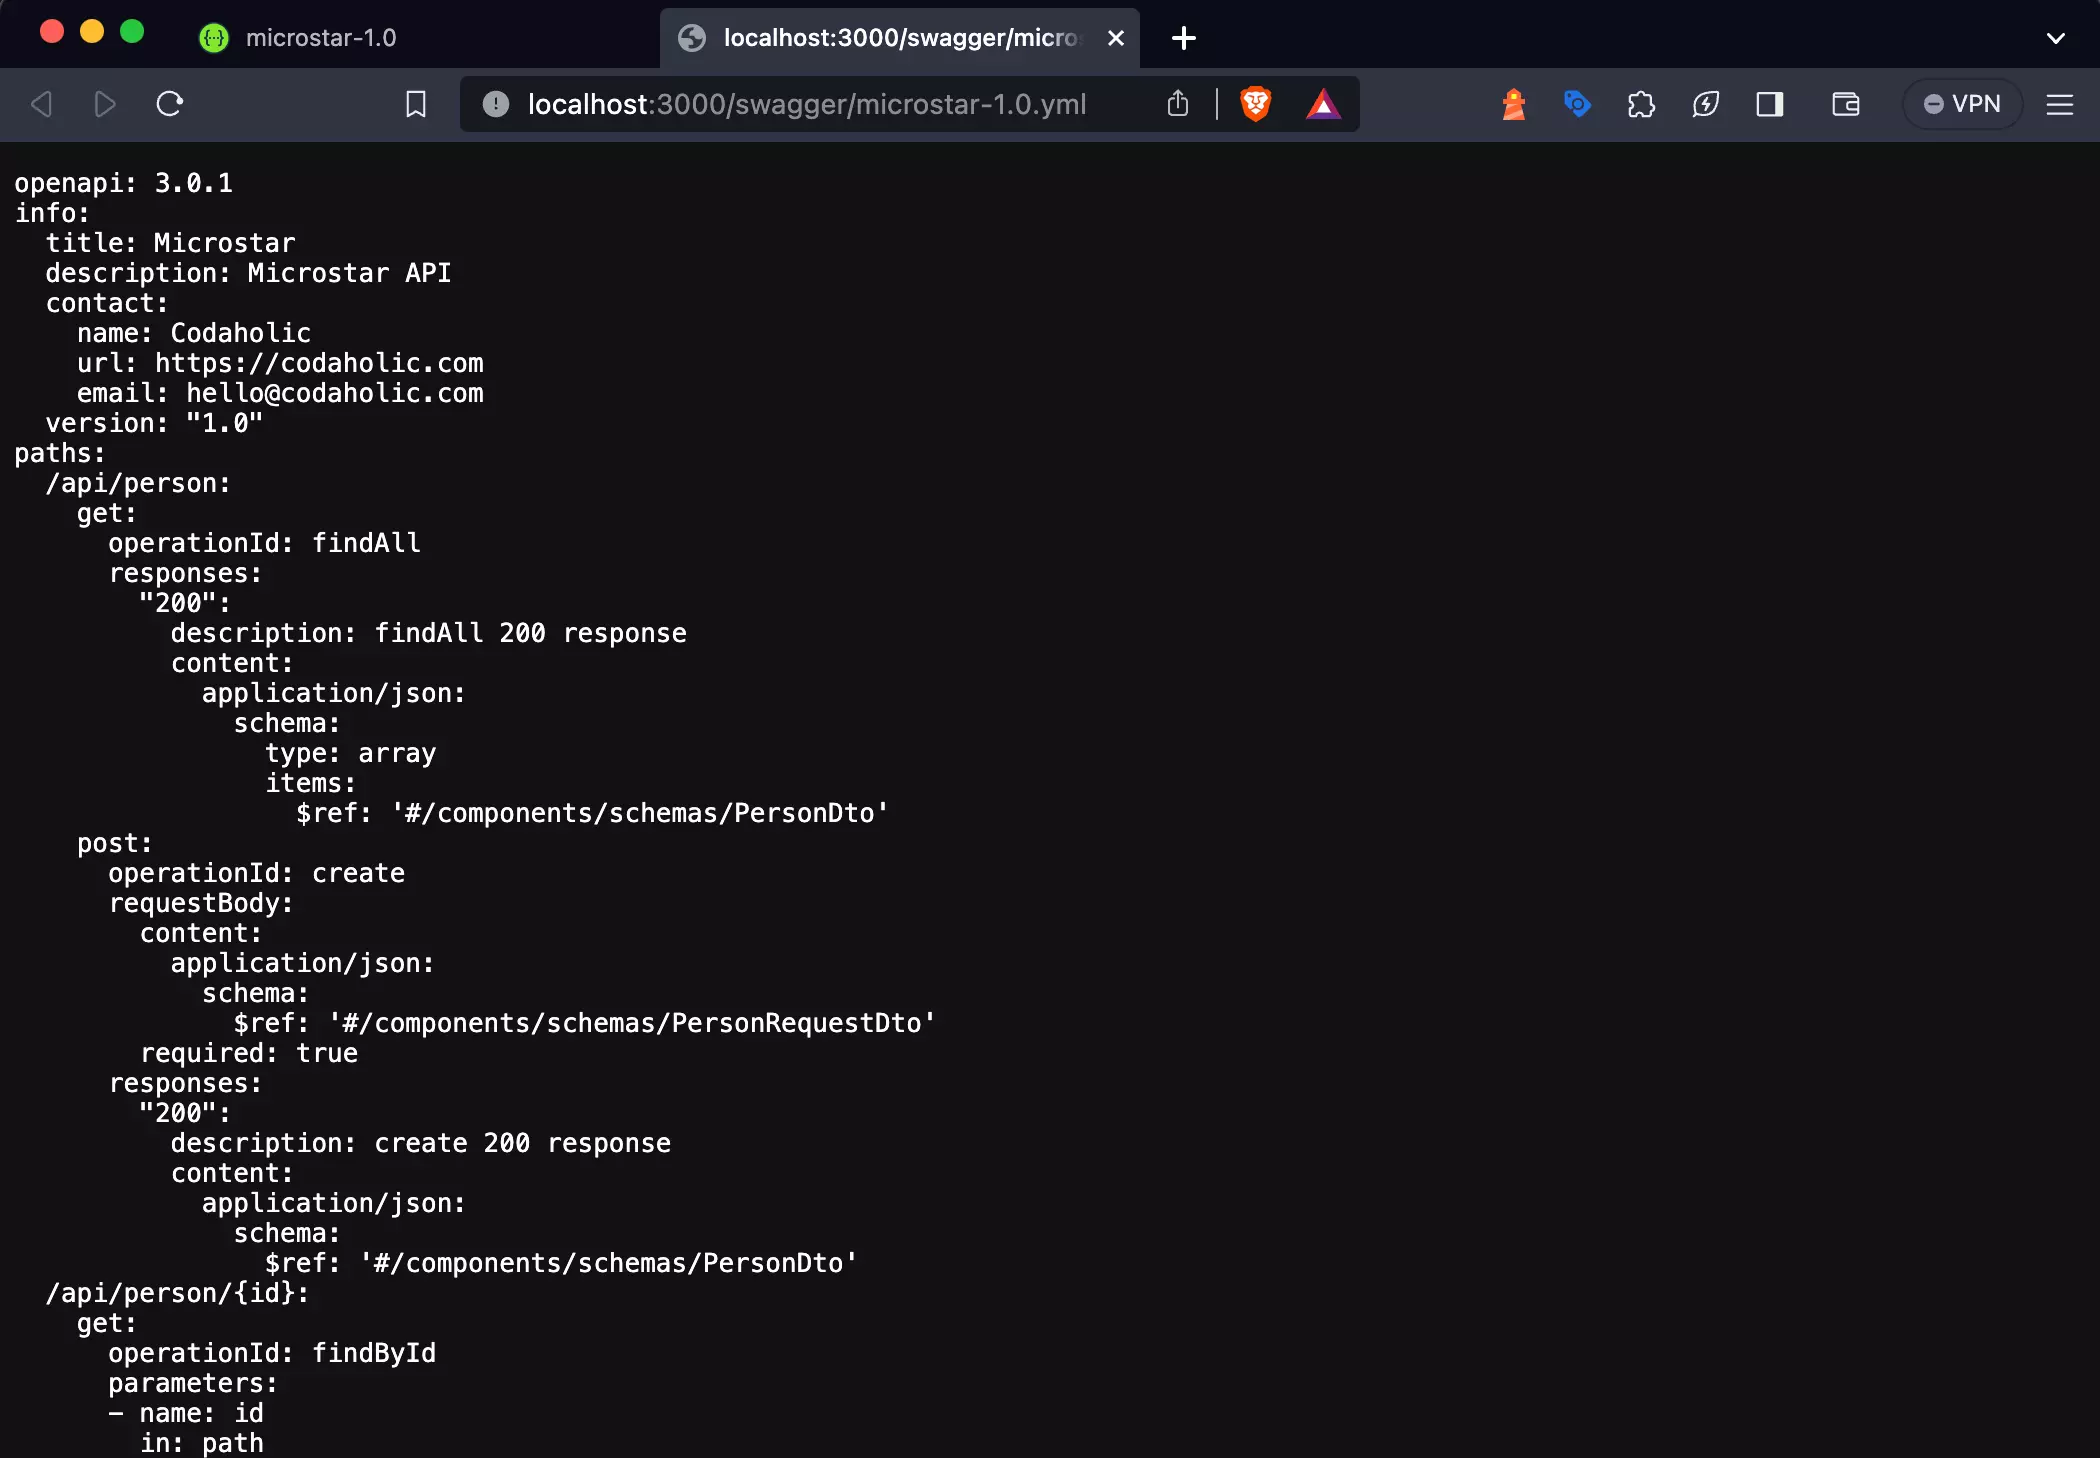
Next, highlight and copy the Swagger documentation URL in your browser’s address bar.
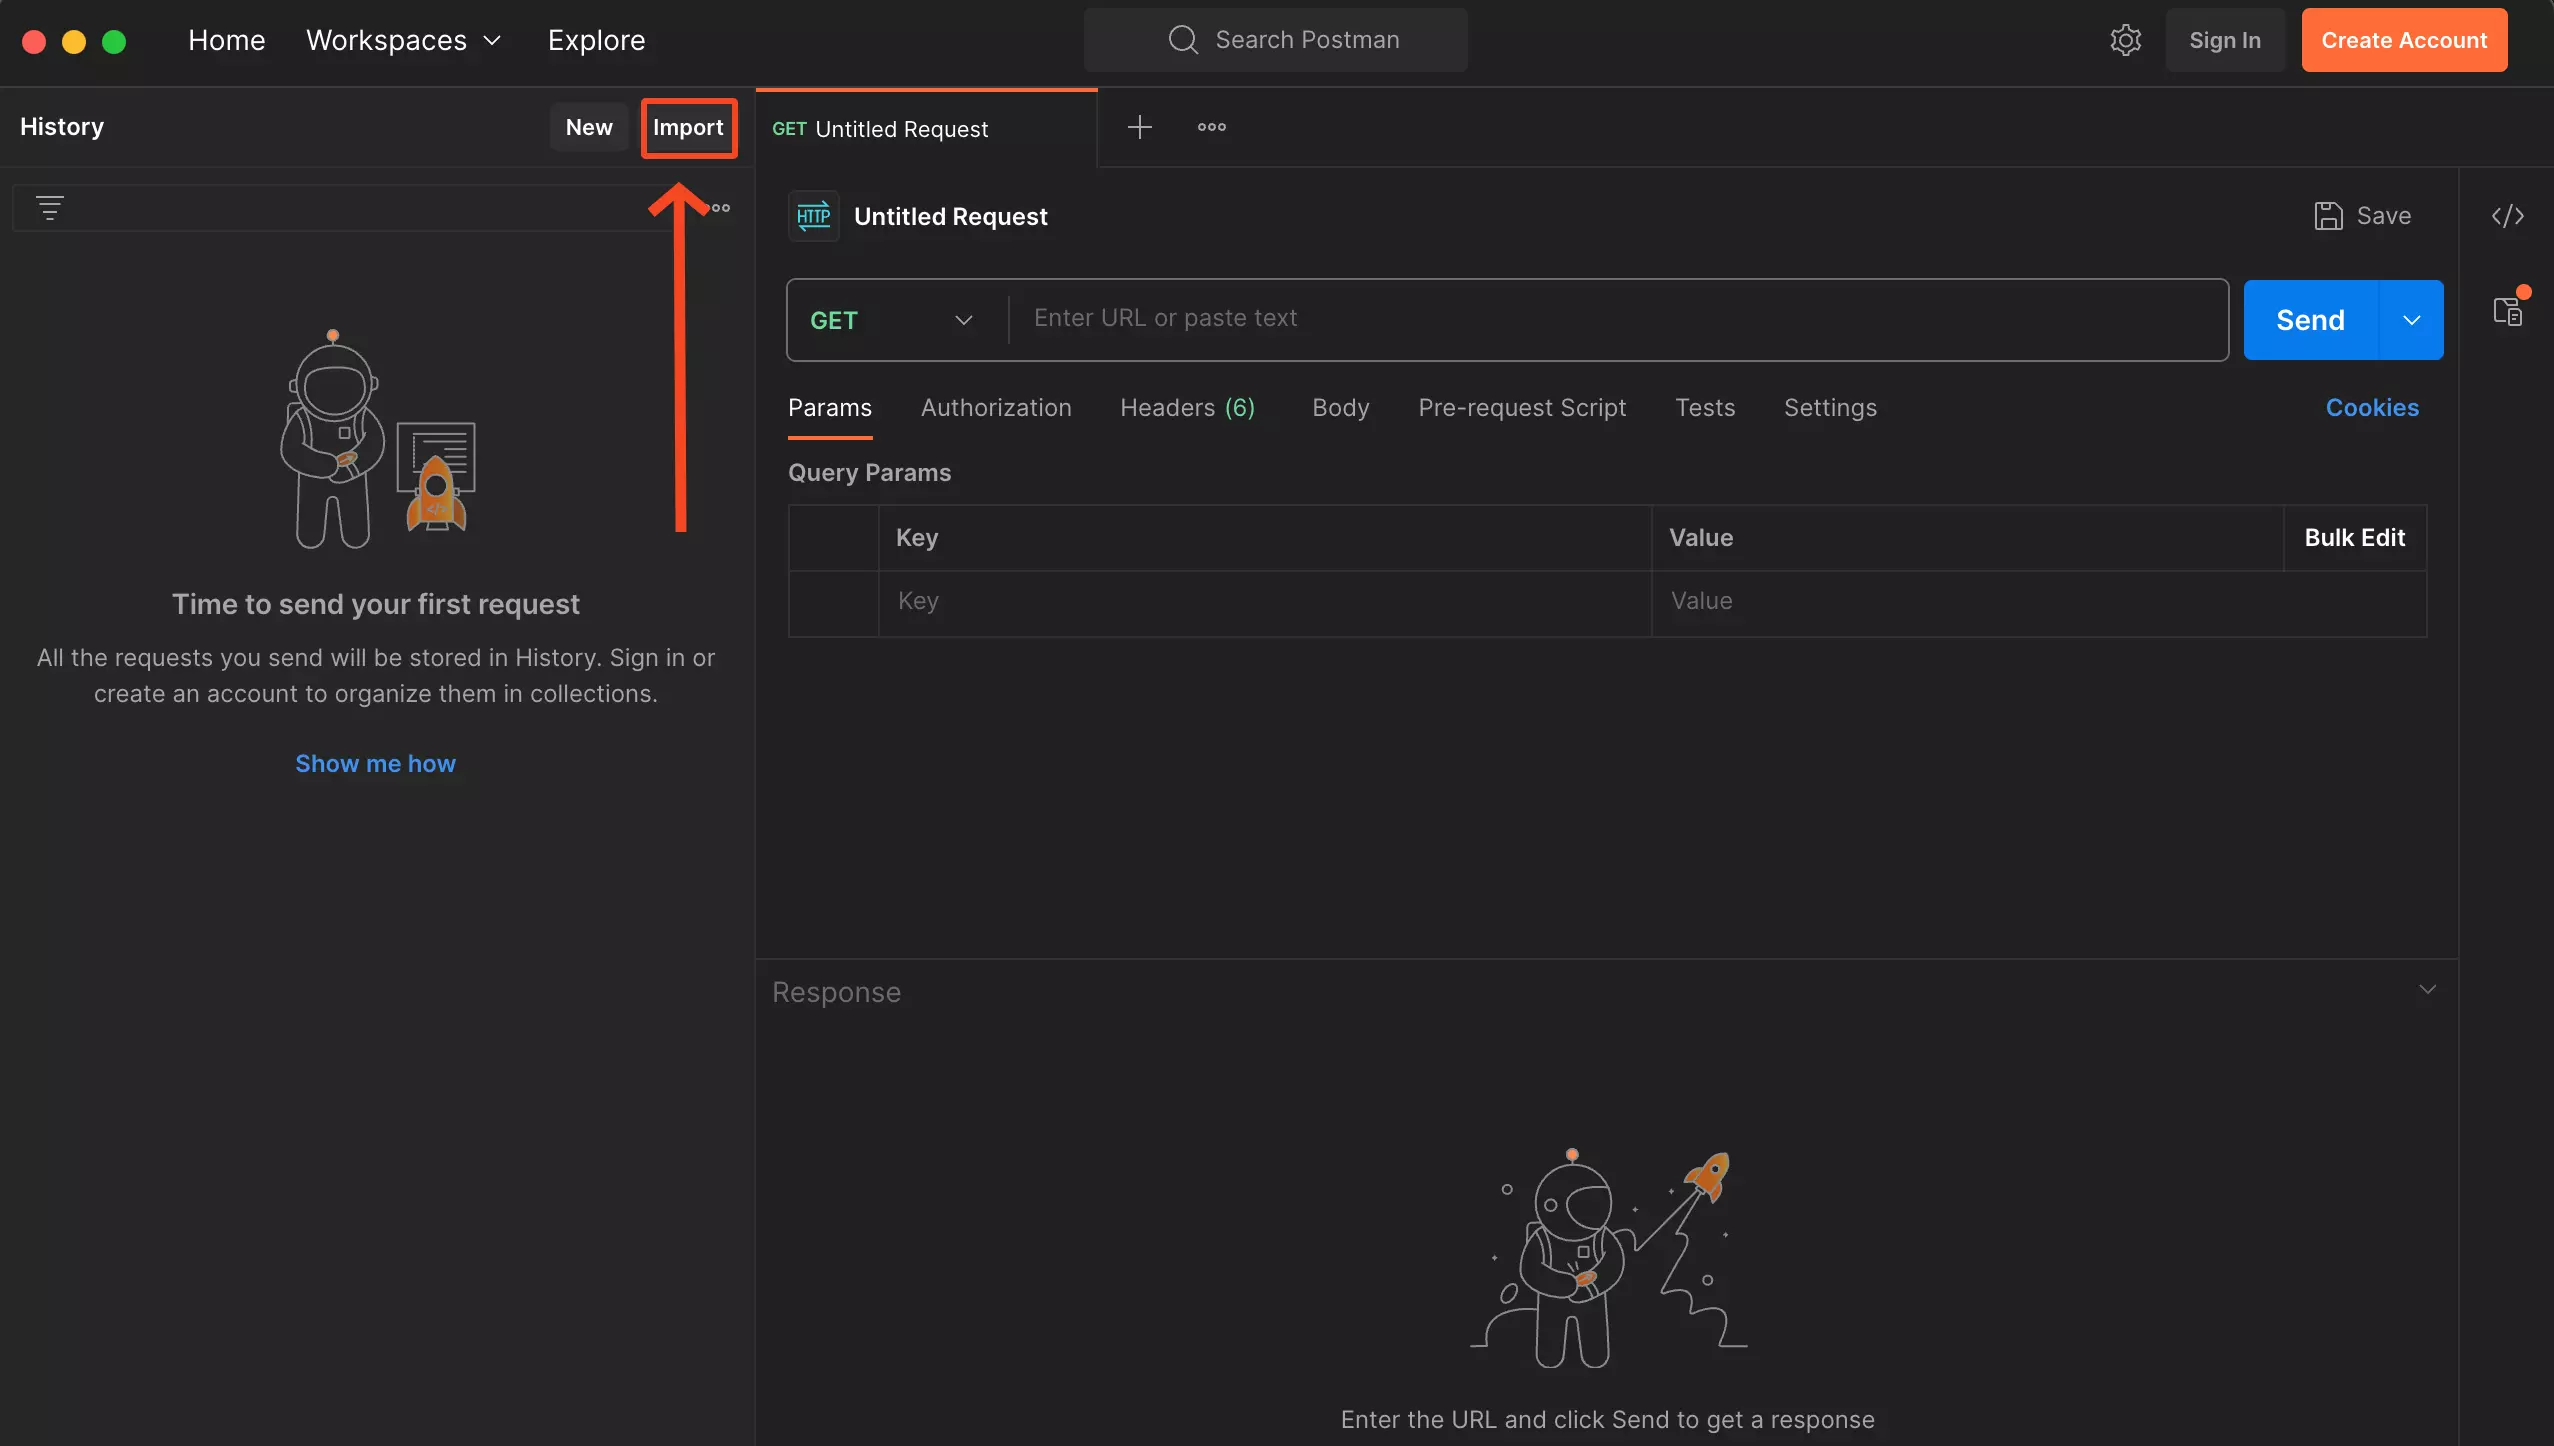
Step 2: Import the Swagger Documentation into Postman
Next, you’ll need to open up Postman. If you don’t have it installed, download it from the official website or use the web version. I’ll advise you to install it on your system, as you can access it anytime without an Internet connection. Postman is available as a desktop application for Windows, macOS, and Linux.
Next, click on import and enter the URL. You can use the default configuration that comes with Postman for the import process.
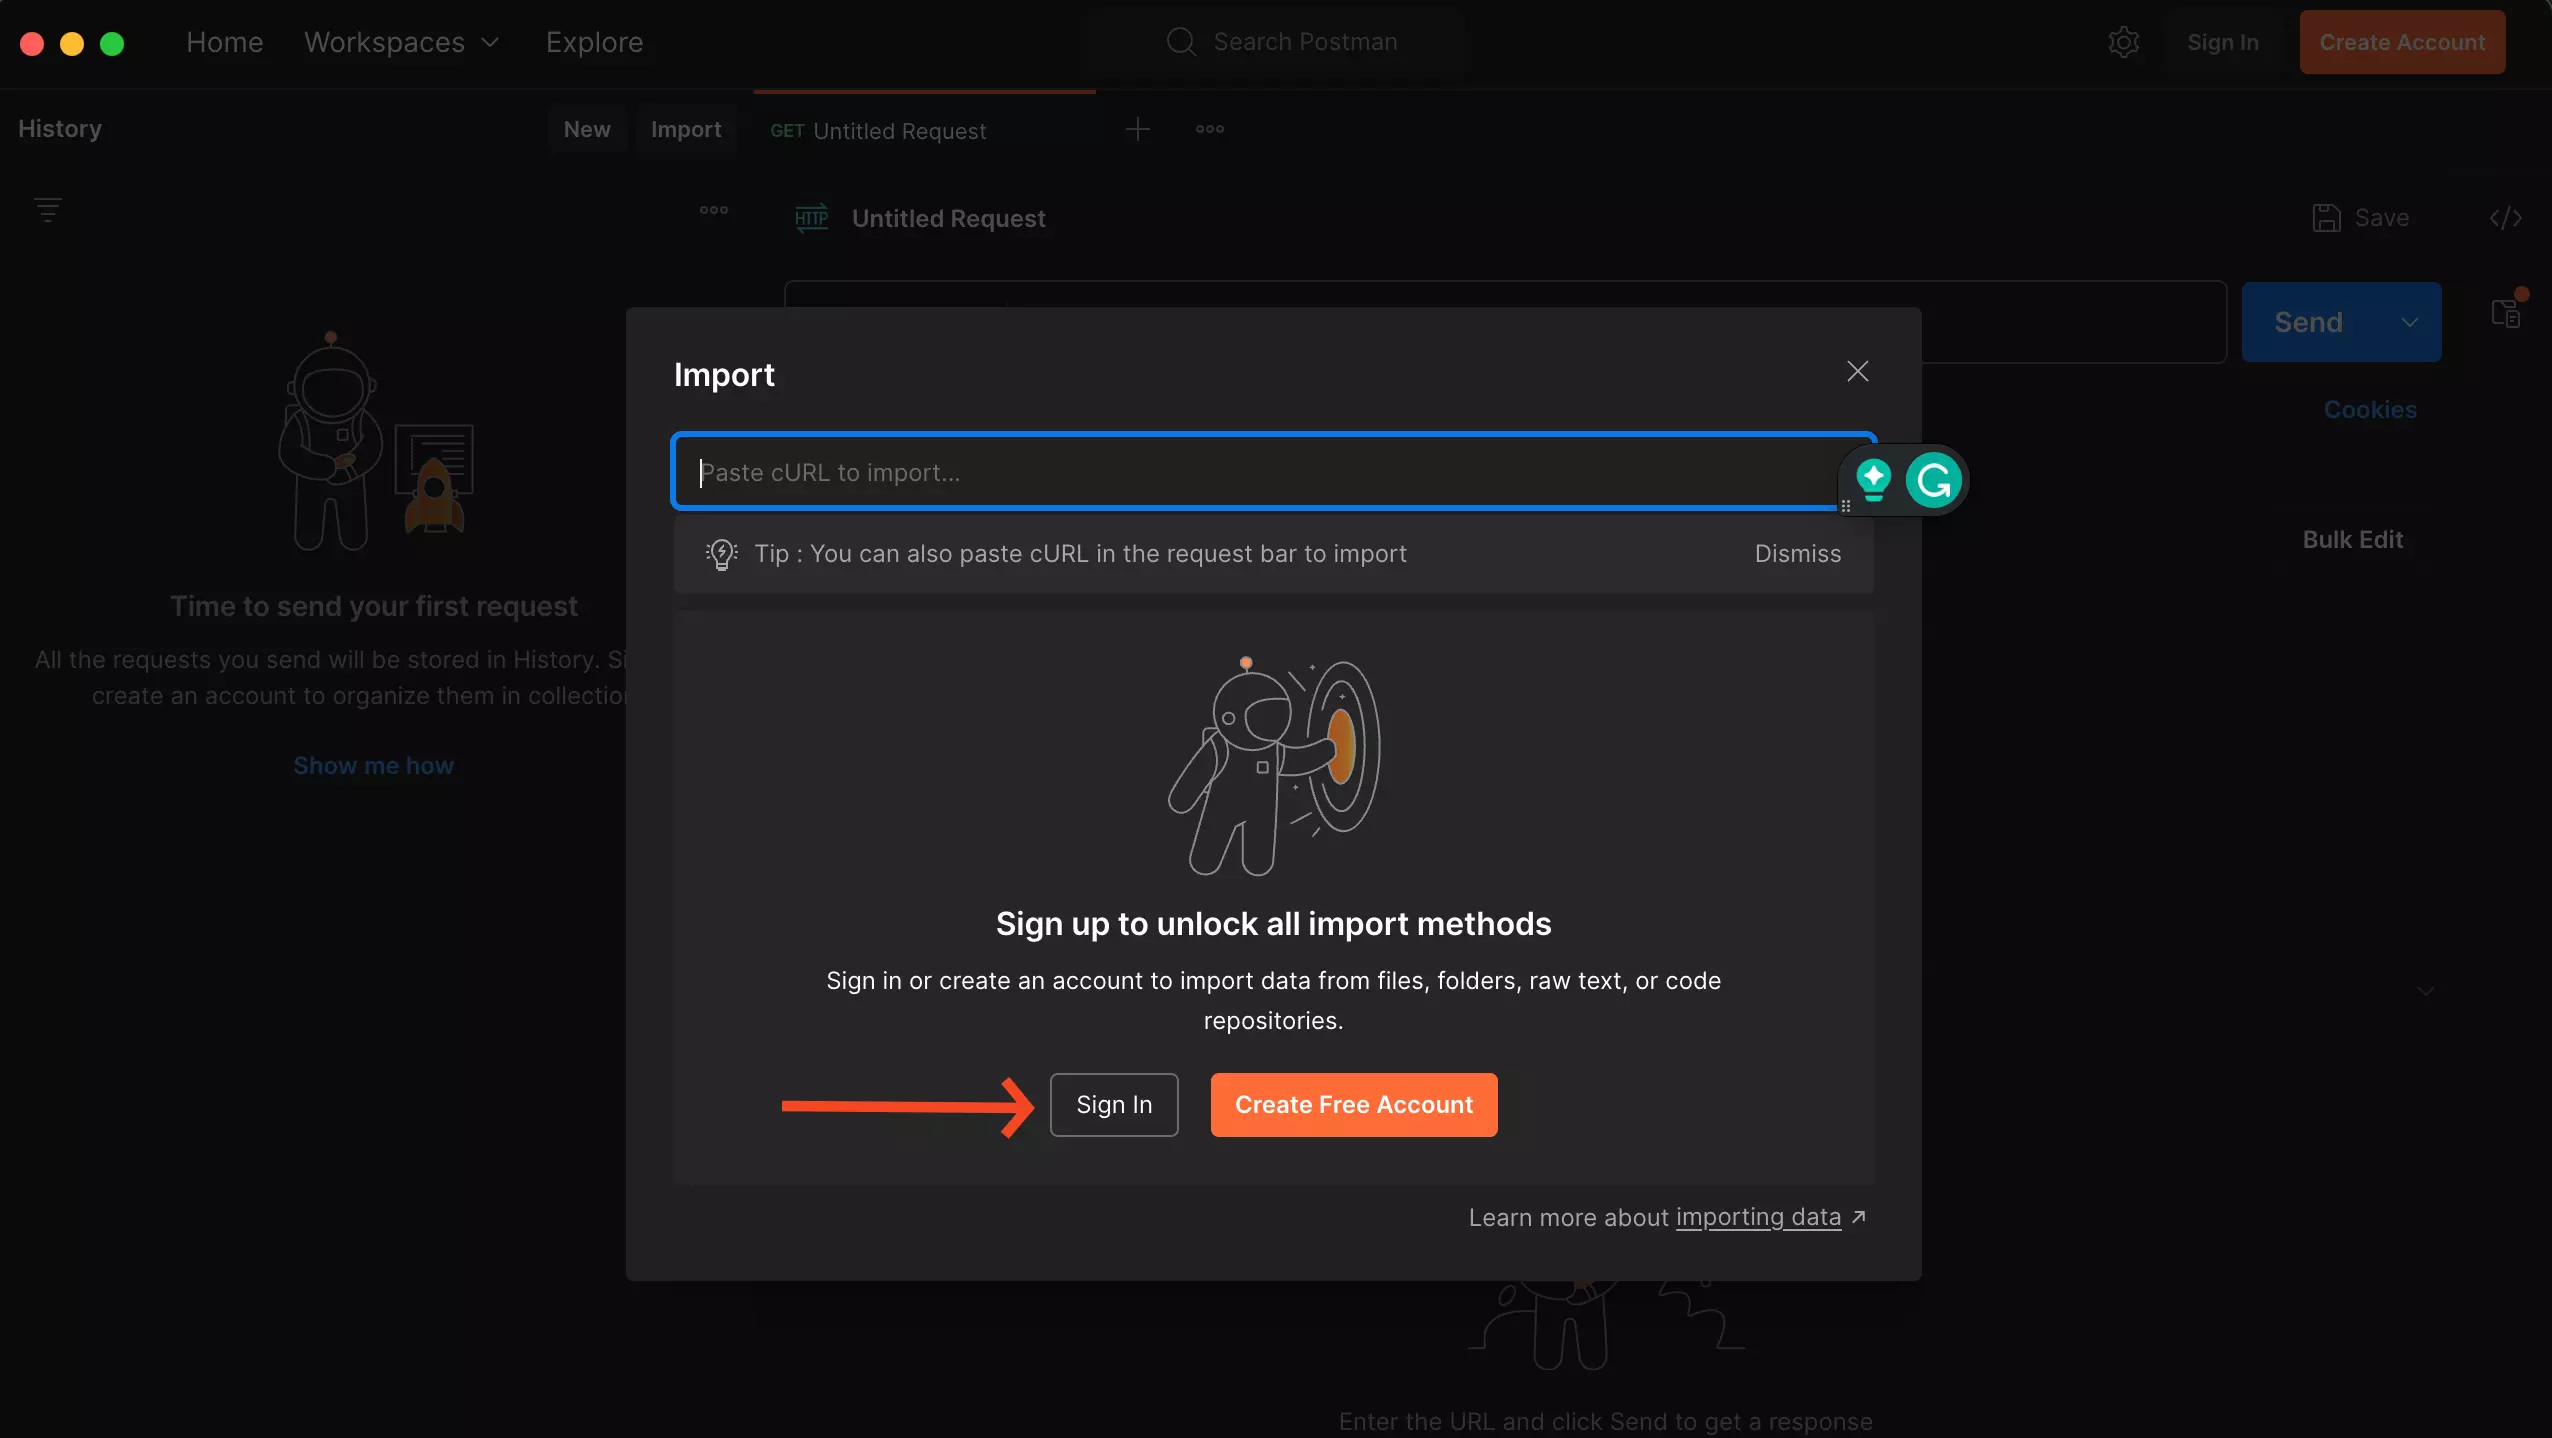
You’ll notice that when you follow this particular step you will notice the following error showing on your screen Invalid cURL request. Please try again
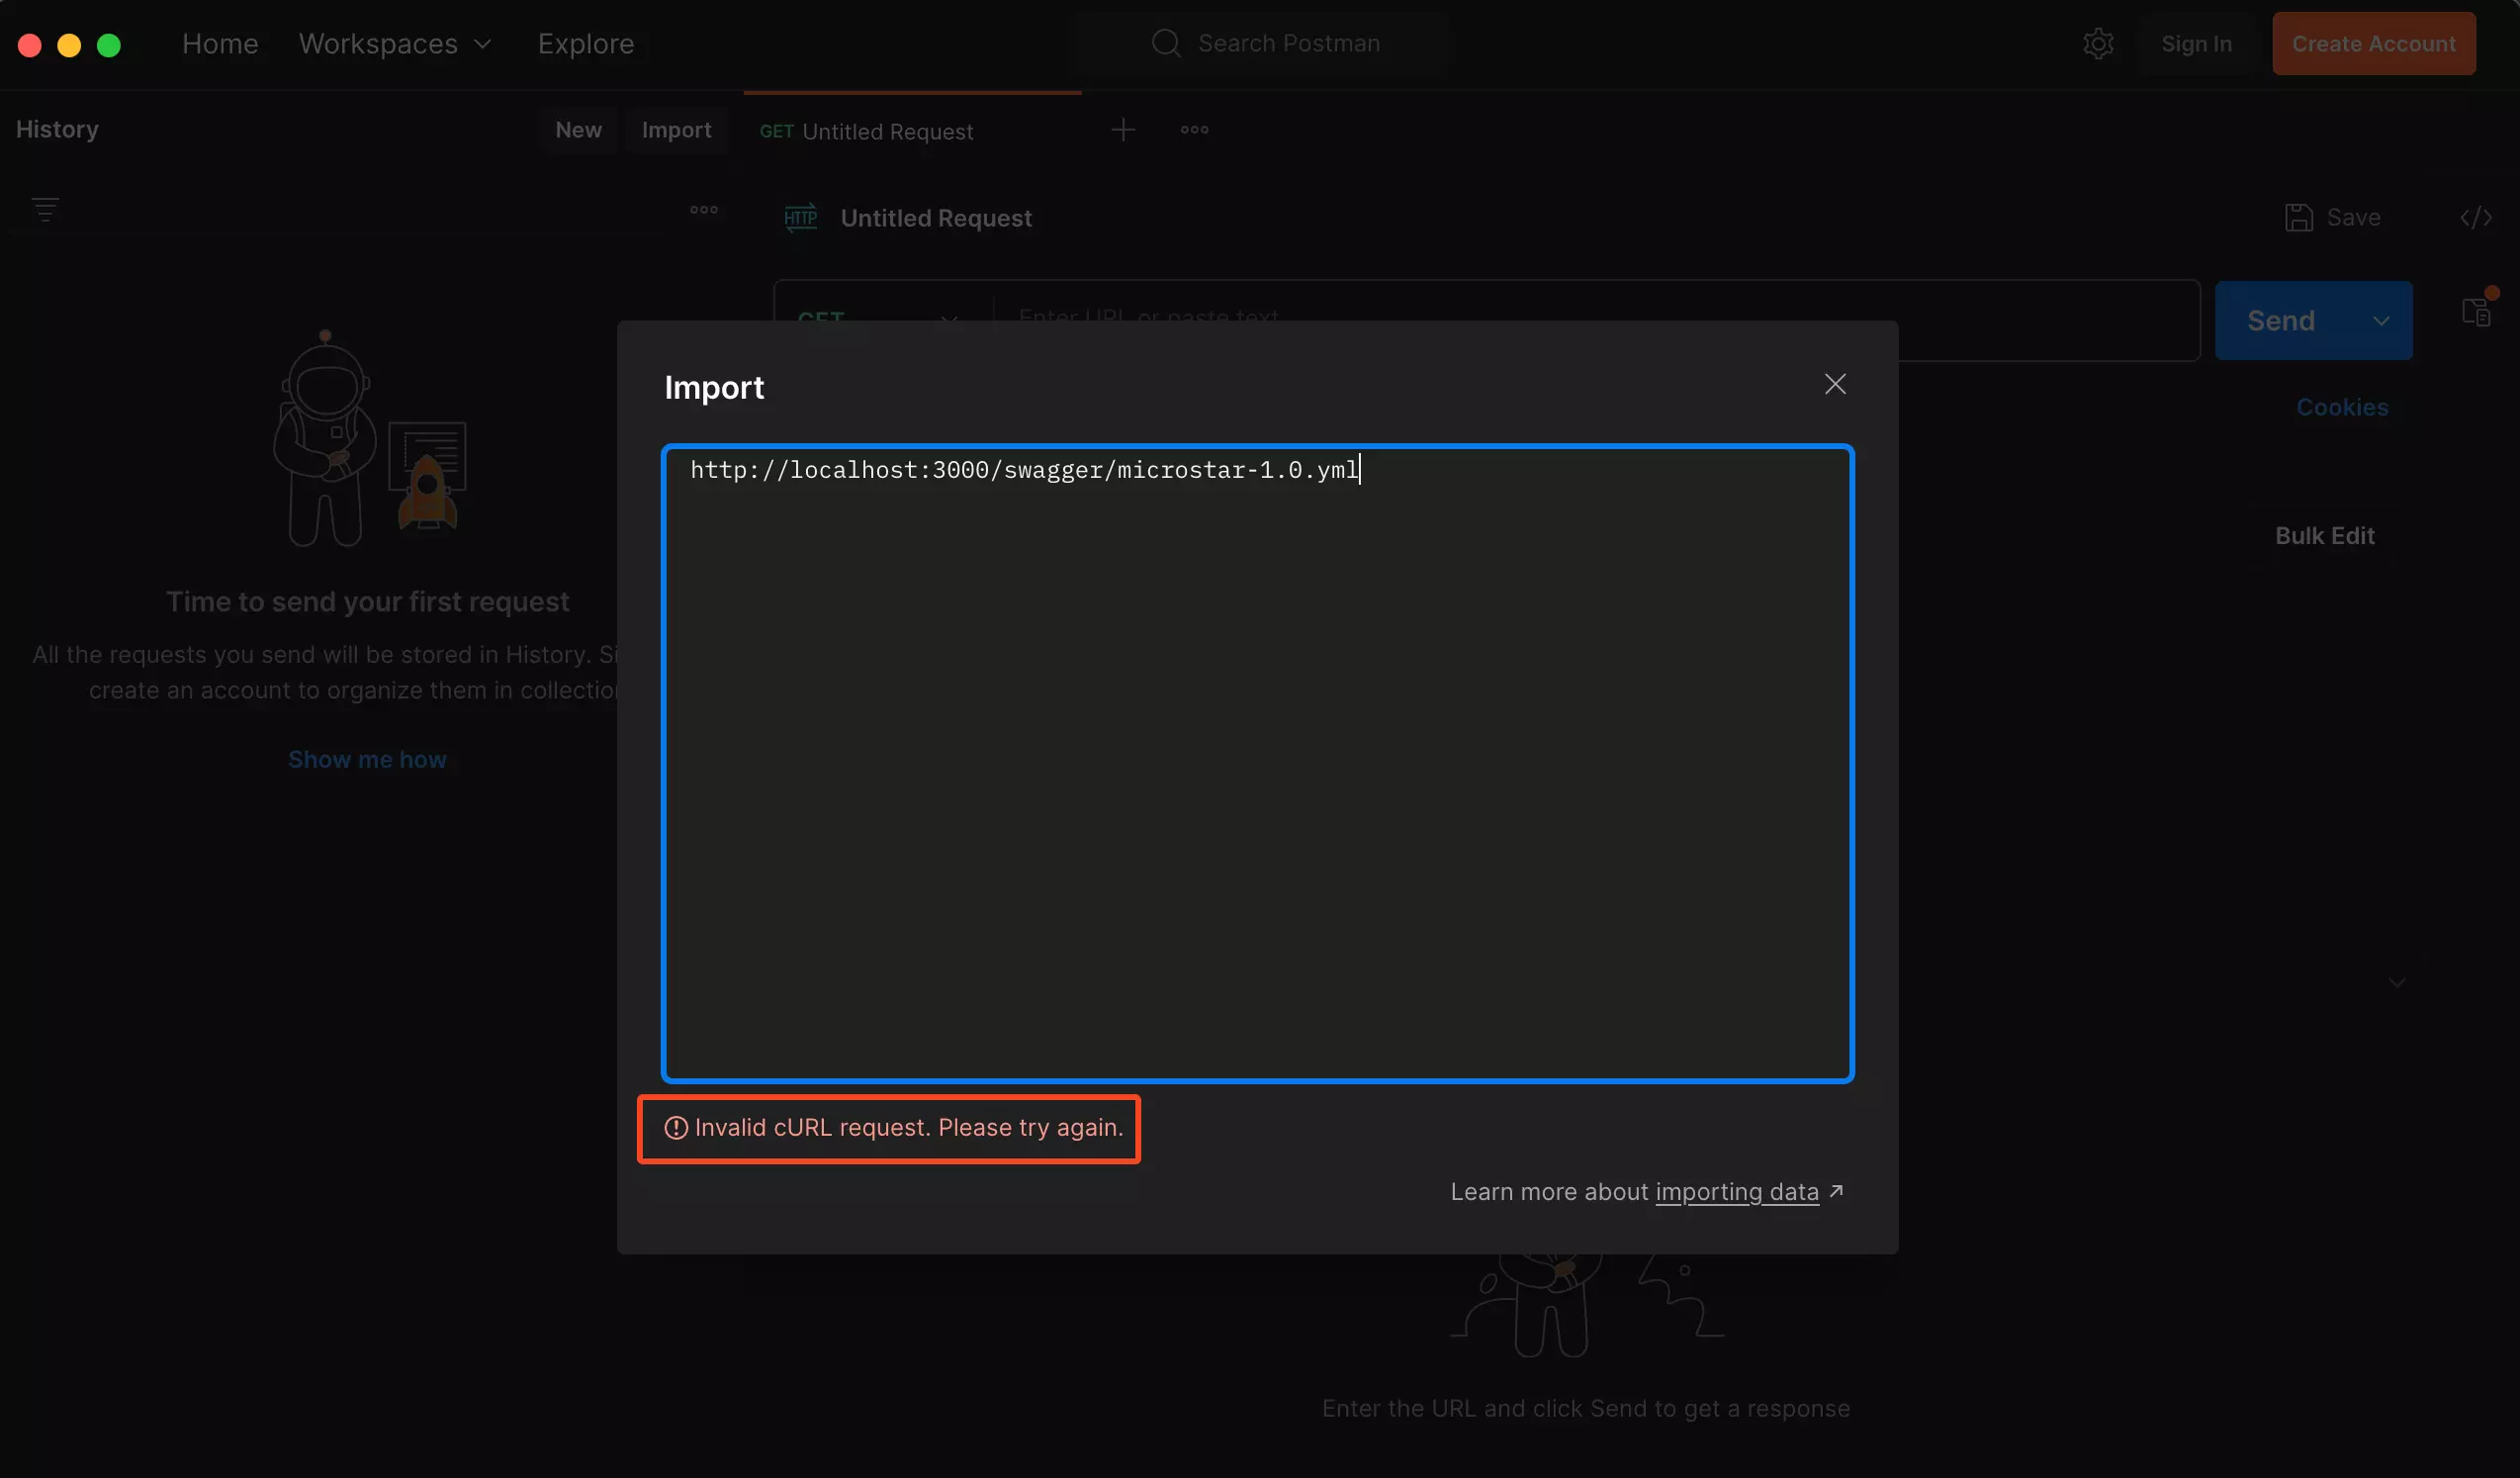
To solve or fix this particular error, all you need to do is create an account on Postman or sign if you already have an account. You don’t need to go through the process of creating an account, just click on Sign In and sign in using your Google account. Doing this will automatically create an account for you if you don’t have one and then sign you into Postman.
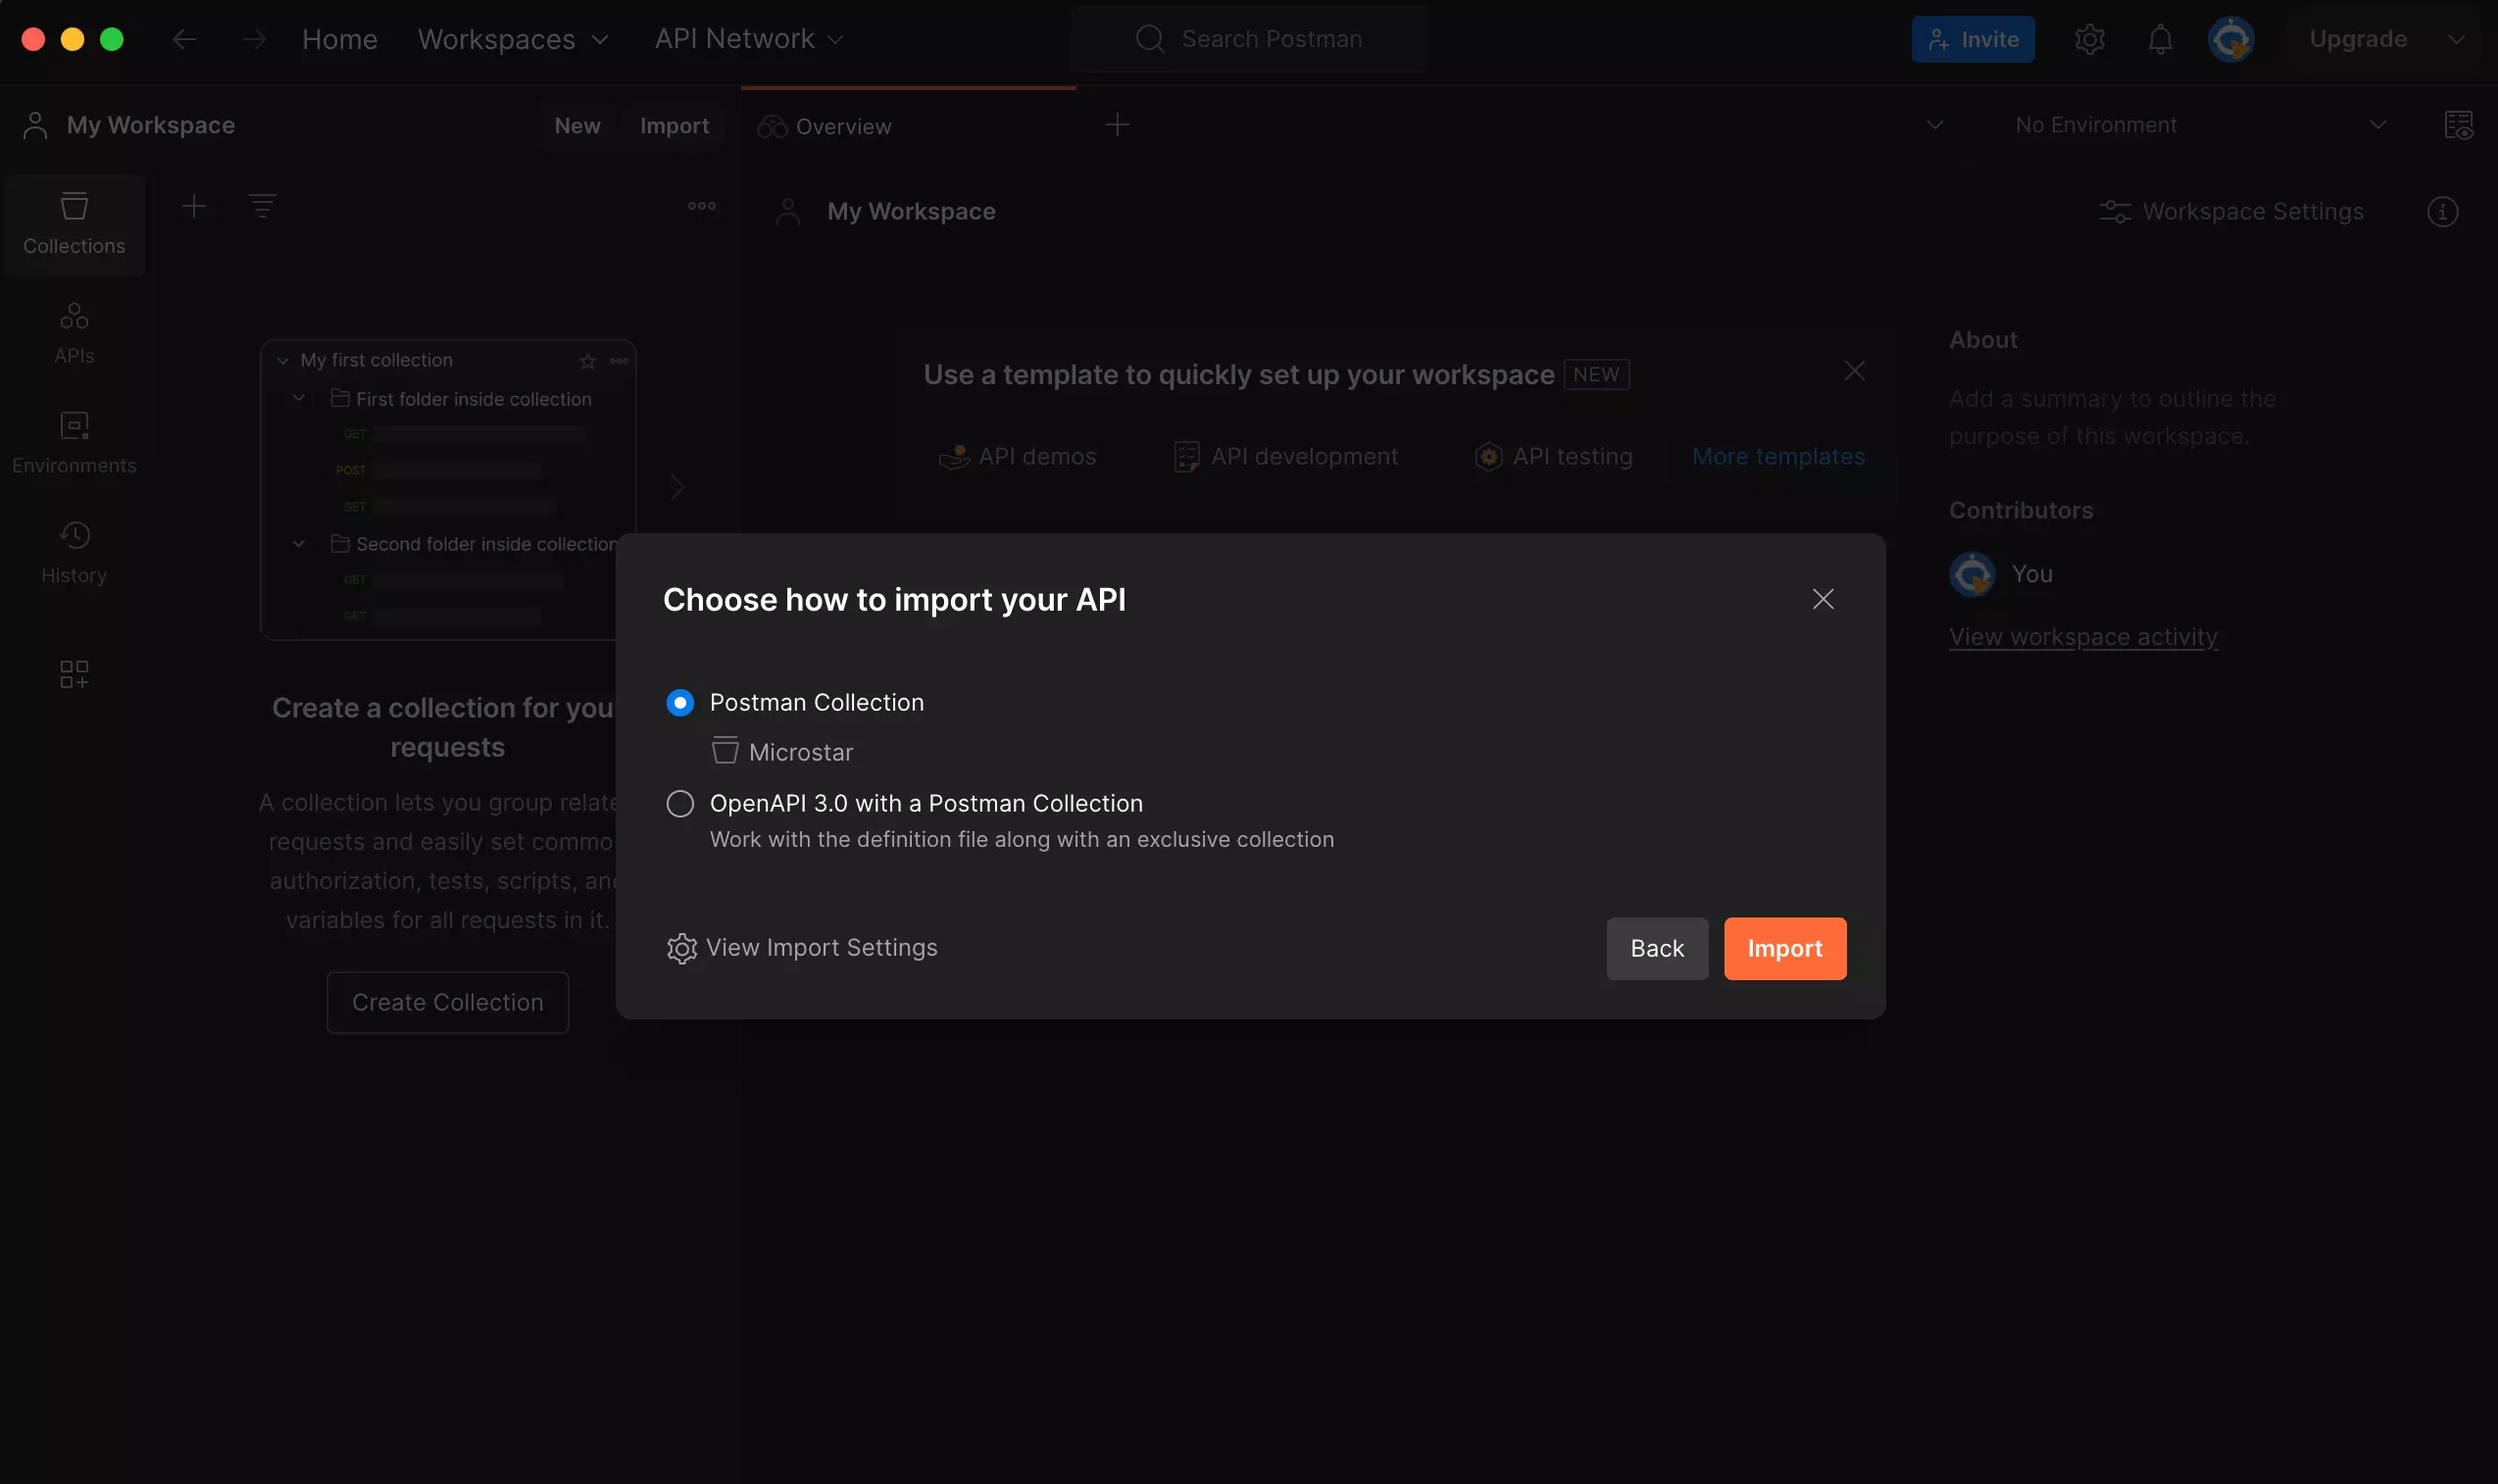
Now that you have signed in, click on the import button again and then paste the swagger documentation URL again.
Step 3: Check and Organize the Collection
After importing the Swagger documentation, Postman will automatically generate a new collection containing all the relevant endpoints, requests, and response details. It is crucial to thoroughly review this collection to ensure the imported information is accurate and properly organized within Postman.
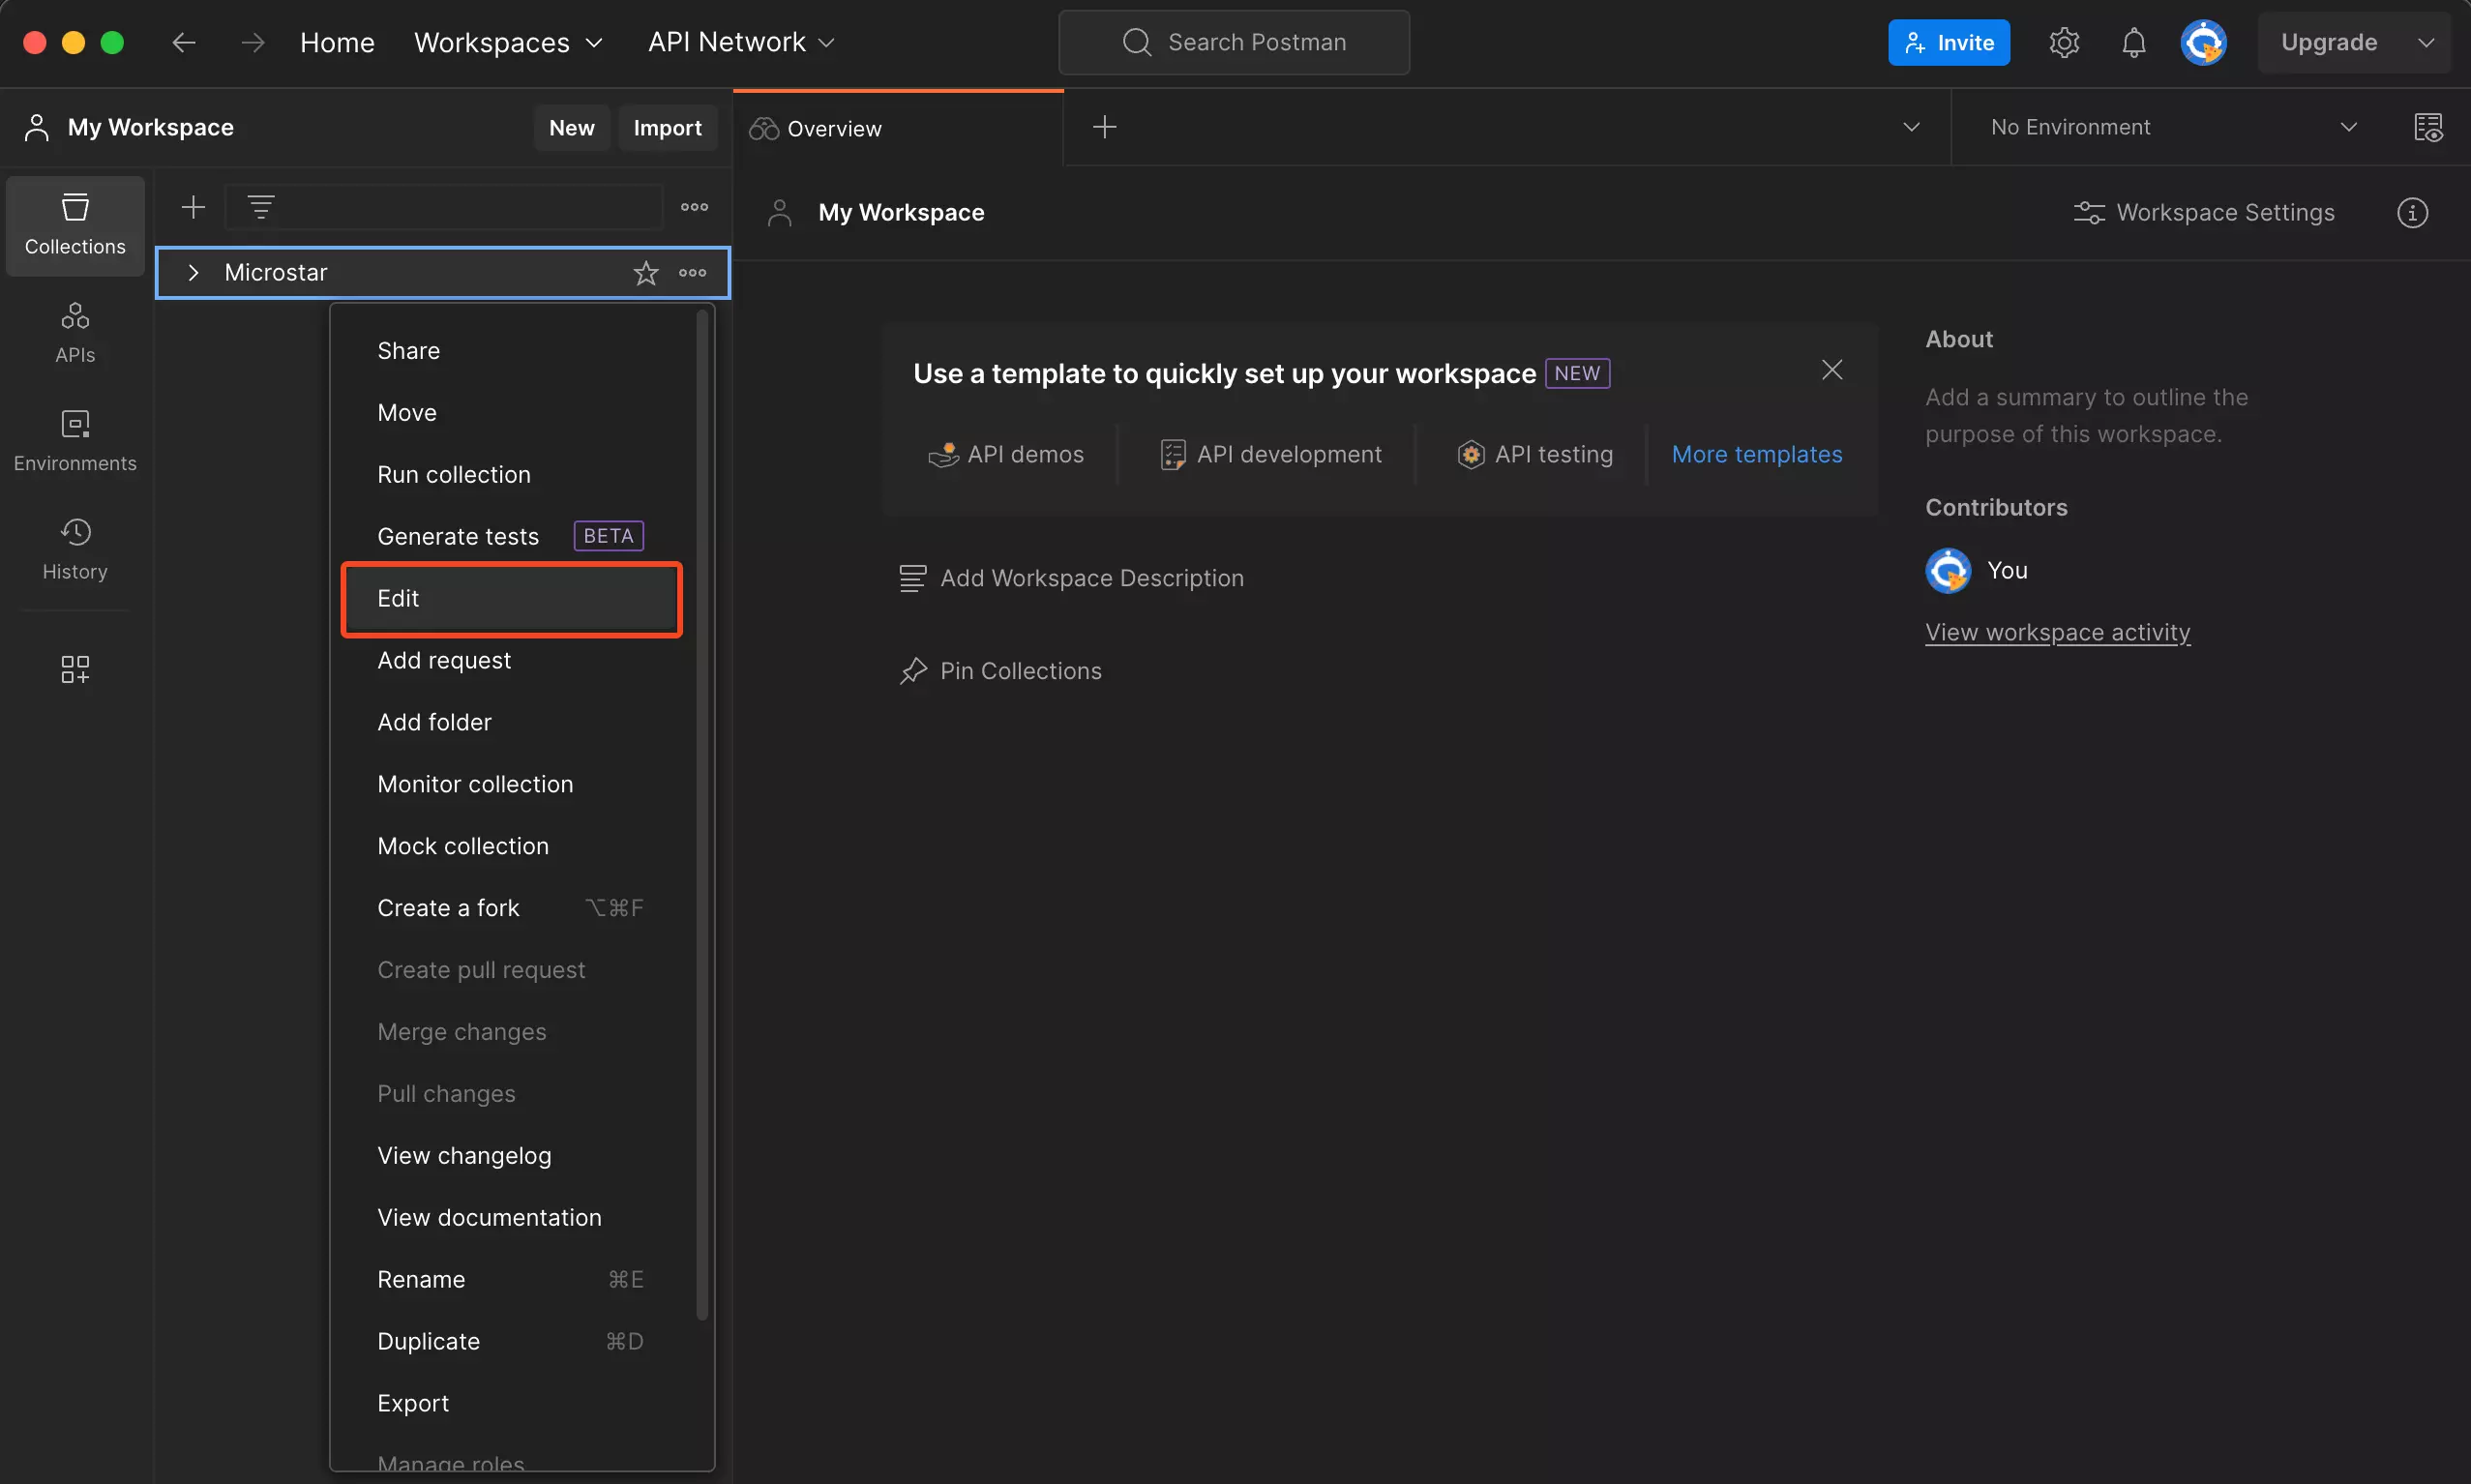
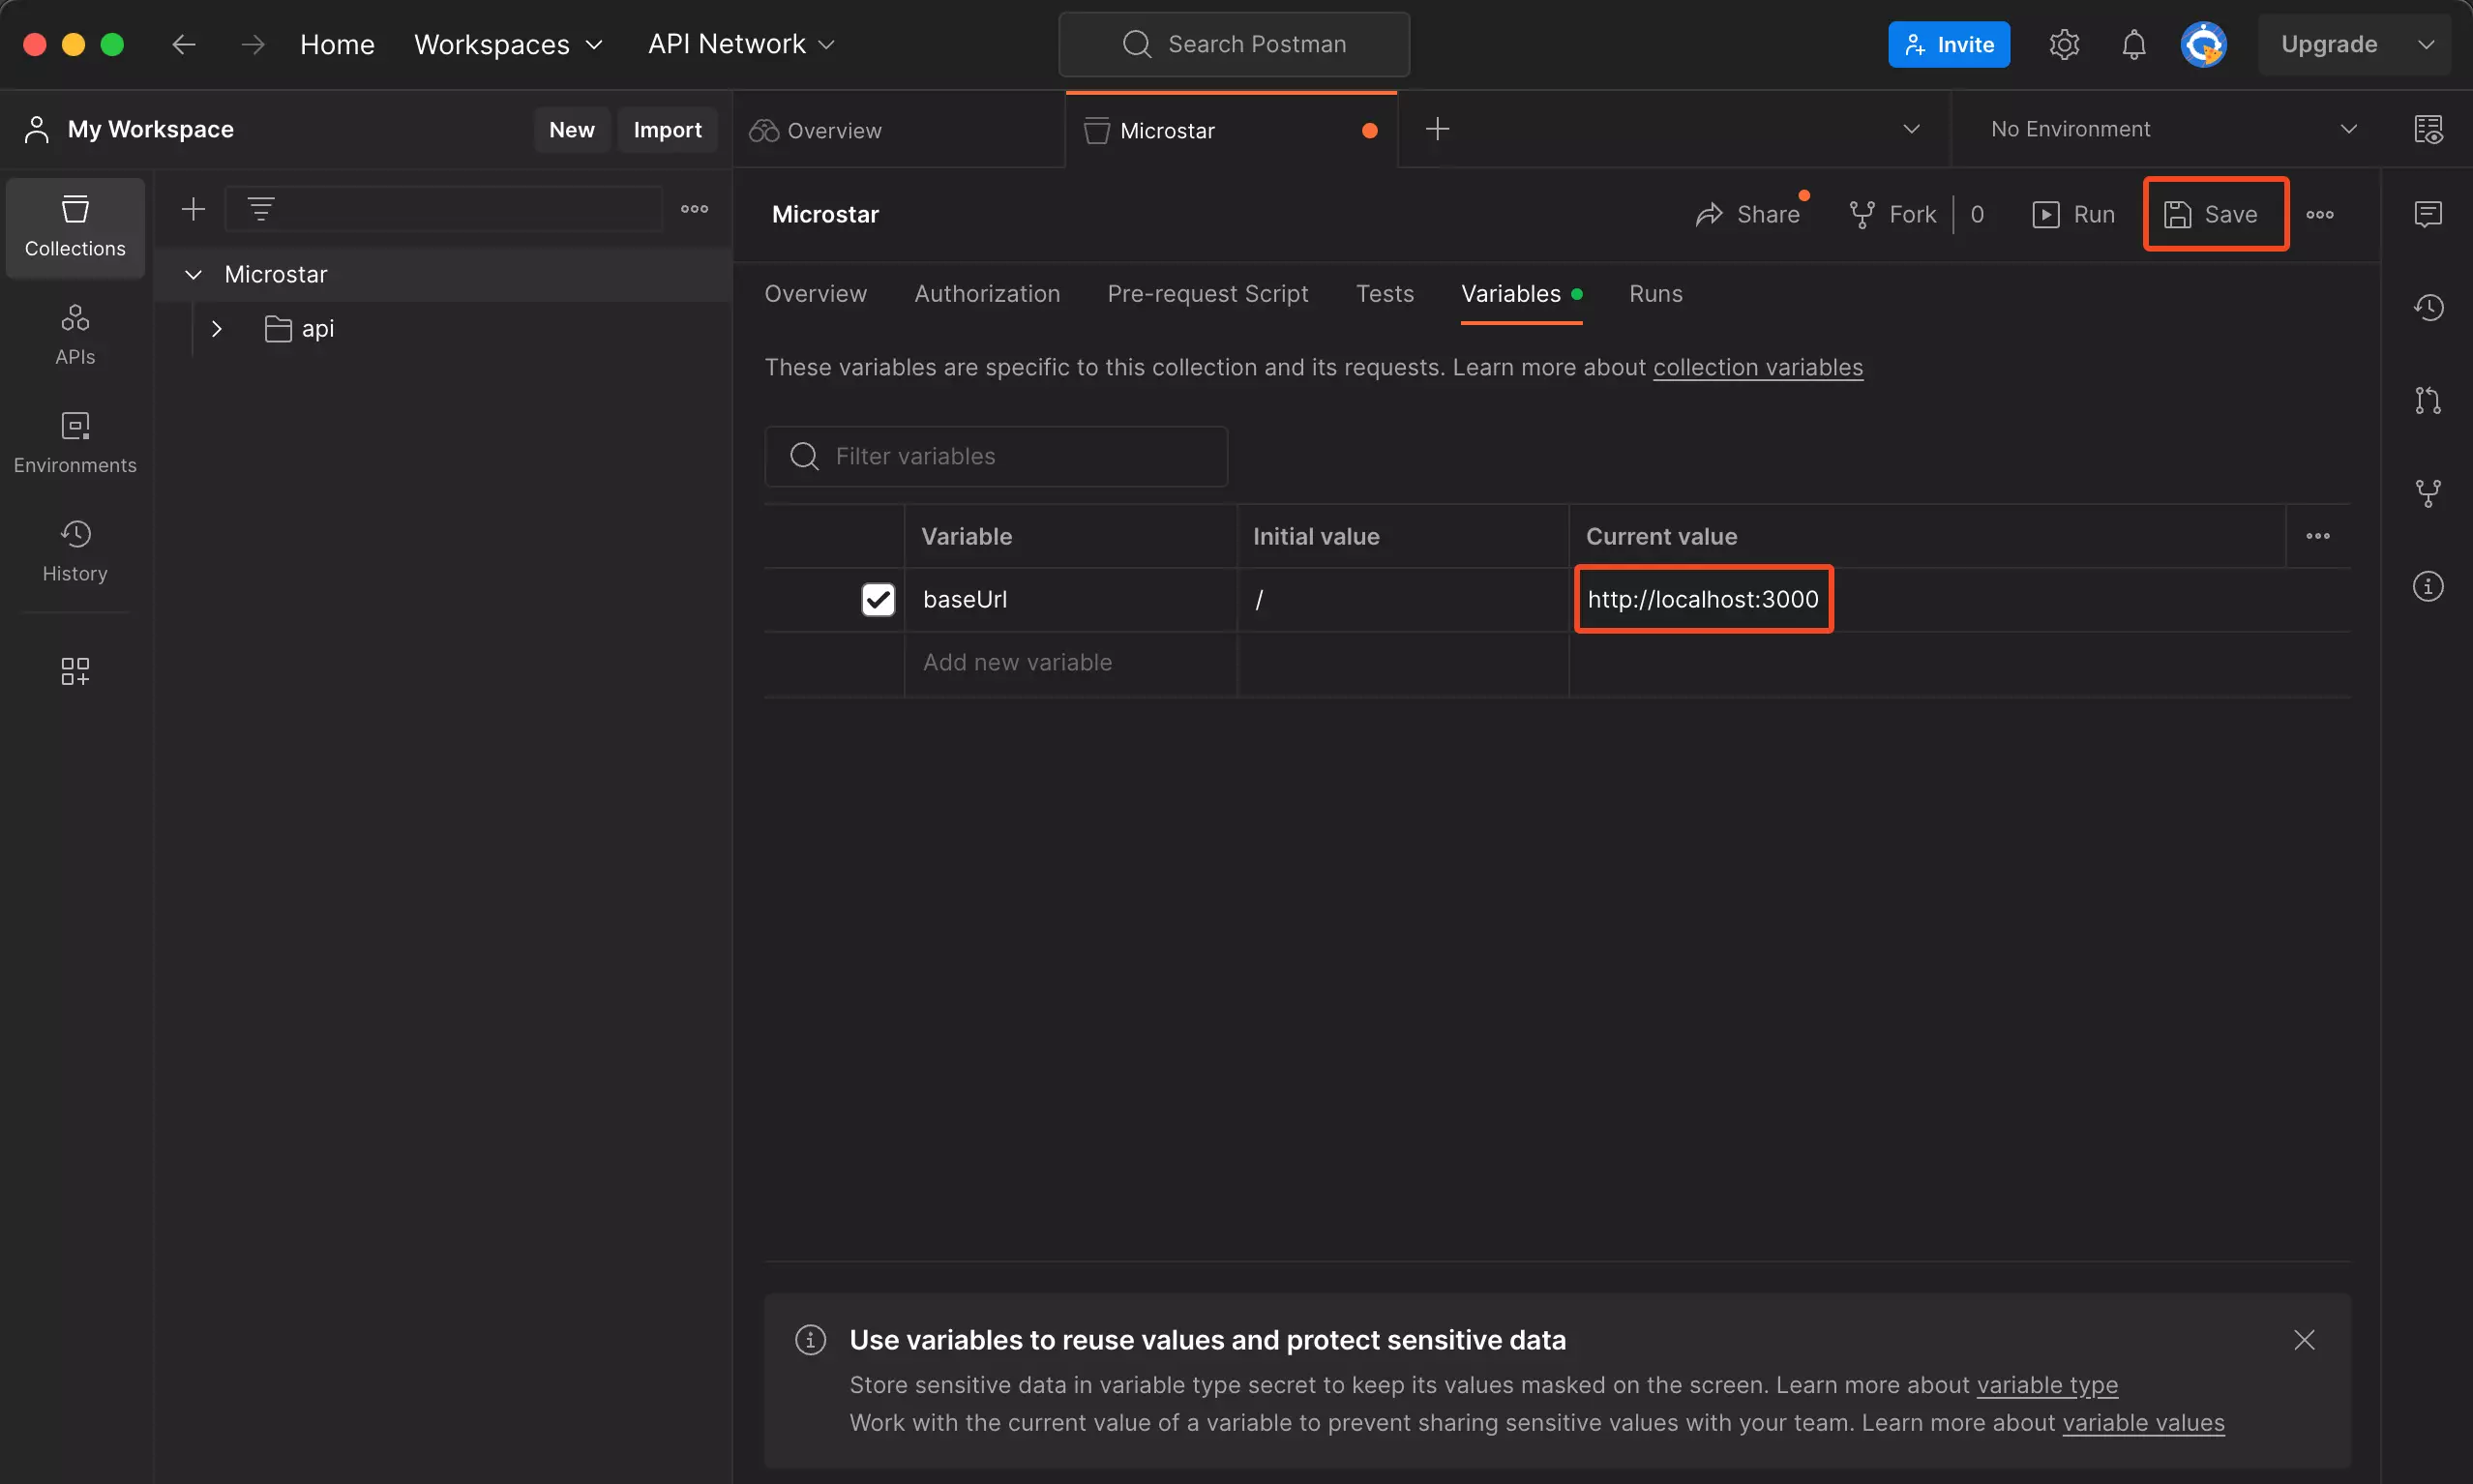
To initiate the process, I typically modify the baseUrl value. As evident from the URL section, there are baseUrl variables that usually remain empty. To modify the baseUrl value, I click on the three dots (…) on the collection, navigate to the variables tab, and update the current value of baseUrl. In my case, since I am using localhost, I changed it to http://localhost:3000.
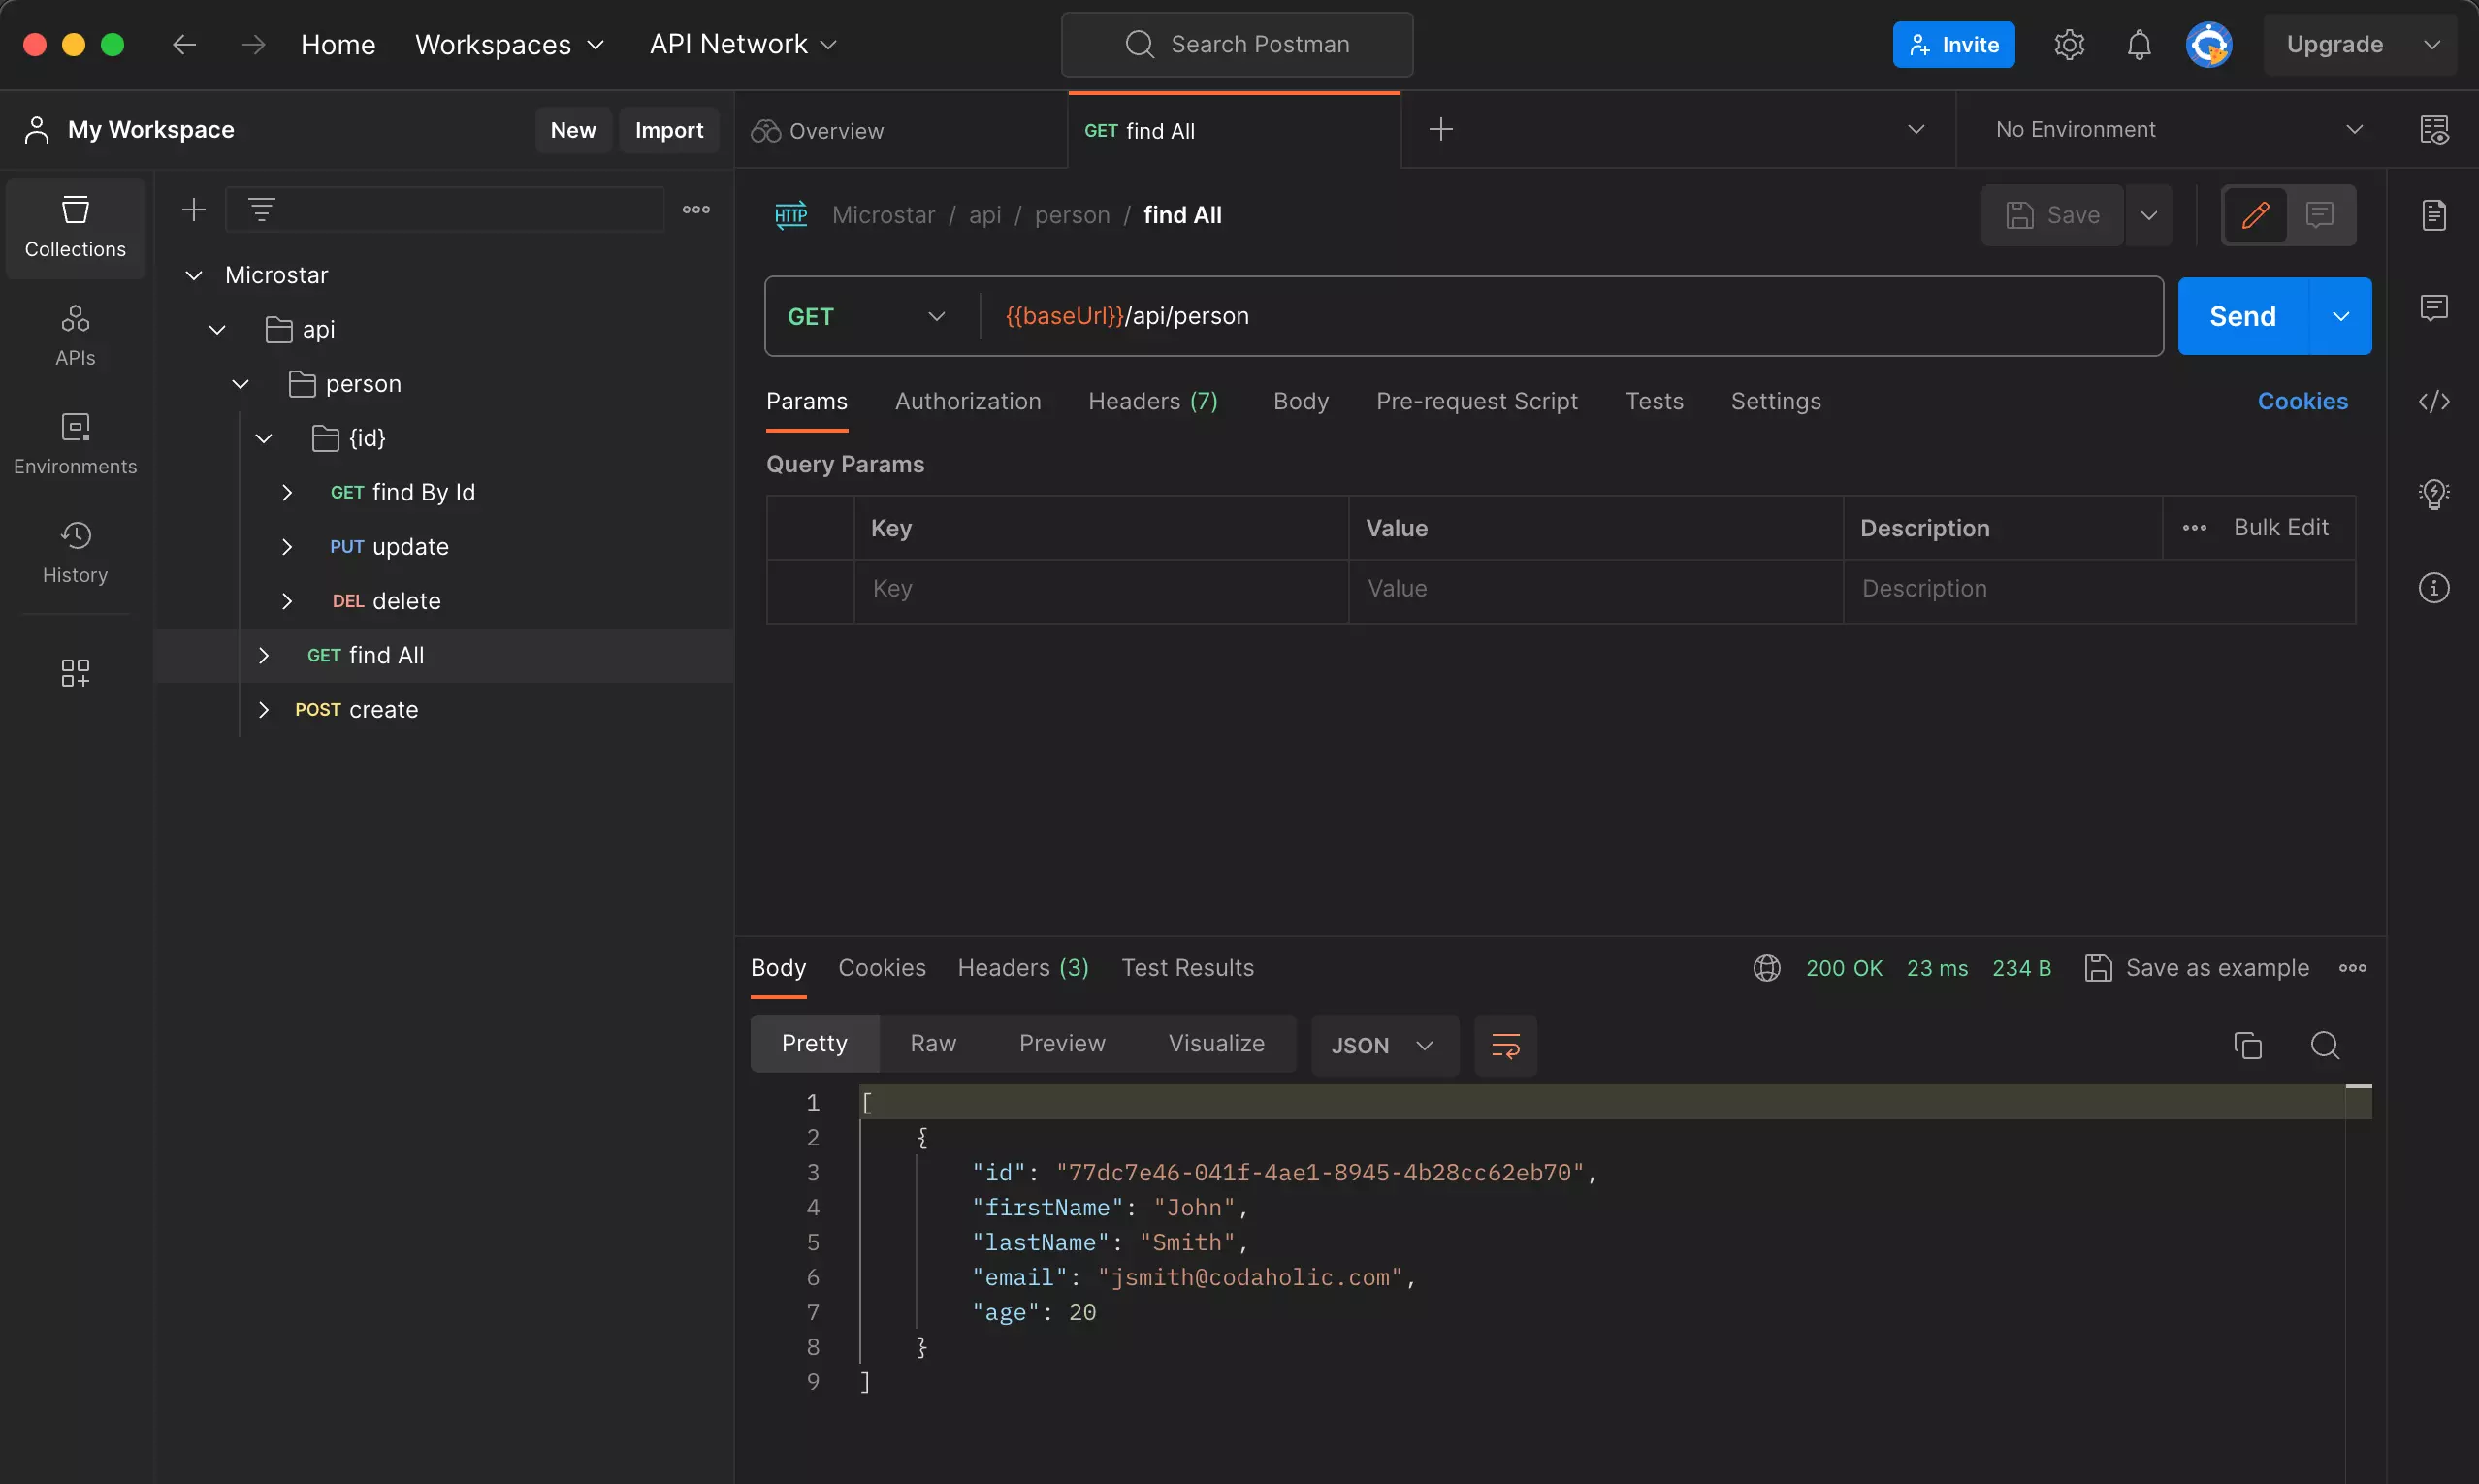
Step 4: Carry out API Endpoint Testing
Now that you have your Postman collection set up, it’s time to test the API endpoints. Postman offers an interactive interface that allows you to send requests and view responses in real-time. You can either send individual requests or run the entire collection to test all endpoints in sequence.
Conclusion
Converting Swagger documentation into a Postman collection allows you to use Postman’s robust API testing and interaction features. With its intuitive interface and comprehensive capabilities, Postman is a popular choice among developers for API development and testing. Following the steps outlined in this article, you can easily import your Swagger documentation, organize the collection, test your API endpoints, and save the collection for future use. Happy testing!

Frequently Asked Questions
How do I create a Postman collection?
To establish a collection, follow these steps:
-
Ensure you install the Postman desktop app and sign in to your Postman account.
-
Navigate to the “New” menu and select “HTTP” to create a new request.
-
Enter the request details in the request builder and click “Save” to save the request.
-
select “New Collection” from the top menu to create a new collection.
-
Name the collection and click “Save” to save the request in the new collection.
How do I copy API from Swagger to Postman?
In Postman, navigate to the sidebar and select the “Import” option. From there, you can choose to import an API definition file, enter a link to the API, or paste the raw text of the API definition directly into Postman.
What is the difference between Swagger and Postman?
Postman is generally easier to install and use, while Swagger excels in scalability. Postman performs better in API testing and offers robust data security features, while Swagger is stronger in API documentation and design management.